Second Quarter - Photoshop Exercises

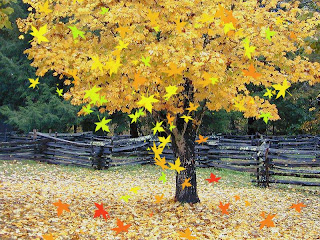
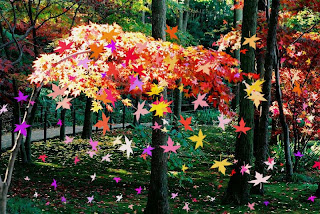
This quarter you are to complete 12 Photoshop Exercises - you can find these in the iLife05 folder in the Server under "Photoshop Exercises". The trick is not to just complete them, but to understand them - to remember how you created them. You may want to do more than one of each, and practice the different effects several times until you learn how to do them. The following exercise "The Leaf Brush Exercise" teaches you a few of the things you can do when using some of the special brushes and the Brushes Palette. The dynamic options in the Brushes Palette introduce variations of color, size, scattering, and other characteristics into the way a brush paints. When you choose Shape Dynamics, you can move the Size Jitter and Angle Jitter sliders to create brush marks of random sizes and angles. The Hue Jitter slider varies the color of the brush marks. You can use many different combinations. Follow the instructions carefully and GET CREATIVE!
In Photoshop we can use the Brushes in many ways. In this exercise you will learn a cool way of using the Leaf Brushes. You can even customize your own Brush – Leaf or Other Brush (by selecting a picture of your choice – ie. a leaf or flower > selecting it with the magnetic lasso tool > creating a layer of your selection > moving it to a white background > then going to Edit – Define Brush (and give your new brush a name and click OK).
You can use any of the Leaf Brushes already in your Photoshop Program.
1. Select a fall picture (a nice landscape or scene with a nice fall tree). Create a copy of the original and save it in your picture folder.
2. Select one of the Leaf Brushes on the toolbar. Select the Brush Tool > go to Brush on your toolbar.
3. Click the Brushes Tab next to the File Browser Tab (or go to Window on your Menu Bar > Brushes).
4. Select the following: Shape Dynamics, Scattering and Color Dynamics (these should be checked – checks on the little squares). When you want to have more control of where to place your leaves, deselect “Scattering”.
5. Right-hand click on the Color Dynamics Option and change the percentages as follows:
Foreground/Background Jitter – 50%
Control – Off
Hue-Jitter – 50%
Saturation Jitter – 50%
Brightness Jitter – 0%
Purity – 0%
(With these changes you can spread leaves of different colors and different sizes all over the picture you selected – to create a colorful and artistic work of art).
6. Use the brush on your pictures and see what happens. You can create different effects by pressing the mouse more on certain areas. The more you press the mouse the more leaves you will see. Add a few here and more there. Change the brush size several times.
7. Get creative!


0 Comments:
Post a Comment
<< Home