Feld's Digital Applications Classes

Friday, February 27, 2009

Third Quarter Exercises

During this Third Quarter you must complete the following exercises and projects:

Exercise No. 1 - The Magazine Exercise
Exercise No. 2 - Leaf Brush Exercise (also create your own brush and create something with it - check the last paragraph of the Leaf Brush Exercise Instructions)
Exercise No. 3 - Like Magritte's Exercise (two of these)
Exercise No. 4 - Digital Work of Art
Exercise No. 5 - Patterned Background with Flower

You will find these exercises in iLife05 > PHOTOSHOP > 3rdQ Exercises.

The Alumnae Reunion movie (group project) is this quarter's main project (it counts as two test grades). Those of you who didn't work diligently and efficiently creating this project (and the other Third Quarter Exercises) won't get a good grade and won't be exempted from taking the Final Exam - especially if you don't complete all the Third Quarter requirements.

I need you to learn how to create your own brush in Photoshop. Please check the "Leaf Brush Exercise" Instructions. If you have any questions feel free to ask Mrs. Feld.

You will create two of "Like Magritte's Exercise" - to have a total of six Photoshop Exercises for this quarter. We may also do some of the textbook exercises to learn new Photoshop Techniques per Mrs. Feld's decision and discretion.

Every student must have at least two digital art works printed in color for the Art Exhibit. Failure to do so will also affect your grade. If you have any questions, please feel free to ask Mrs. Feld.
Wednesday, February 04, 2009

Alumnae Reunion Movie

One of the most important projects we have to complete in our Digital Applications Classes is the "Alumnae Reunion Movie." This year the reunion is scheduled for March 21st (Saturday). Which means that the whole project has to be ready before March 18, 2009. We have to take in consideration that in February we're having our "Winter Break" (No Classes from 2/12/09 - 2/16/09). Kairos XVII will take place from 3/10/09 - 3/13/09. I need your cooperation to make this happen! Sister Carla has entrusted us with this assignment and we cannot let her down, nor let down the Alumnae and Sisters of Saint Basil attending the reunion.

This year the reunion is for Alumnae that graduated in the years ending in "4" and "9," e.g. 1984 and1989. We will scan pictures of former SBA students from the following years: 1934, 1939, 1944, 1949, 1954, 1959, 1964, 1969, 1974, 1979, 1984, 1989, 1994, 1999, and 2004. I will divide the class in groups of two and three and you will create an iMovie with the scanned pictures (and other pictures from yearbooks). We will also select music from those eras to include in the movies. When completed, the group movies will be converted to Full Quality QuickTime movies (best quality) and I will put all of them together to create the final project.

I need you to be very organized when you scan these pictures. Please create folders for each year. These pictures have to be available for everyone in your group, in case some of you are absent. After scanning them, I need you to put them in the Digital Applications Folders so that I can move them to the iLife05 folder in the Server.

You should create a Title Slide for your movie with important events, and things that represent your group's year(s). Enter the year of your movie as a title. An idea is to create a quick collage in Photoshop or PowerPoint and then save as a JPEG. Then, you'll organize the pictures to your liking and insert transitions and visual effects. The pictures should move fast (but not extremely fast). Take in consideration that the visual effects reduce the timing of your photo clips. The transitions should be set to about 0:14 (no more than one second). If you have any questions, do not hesitate to ask me.

You should also add some titles and a few quotes from the yearbooks of your years in your iMovies. Get creative!

This project will be the biggest grade during this Third Quarter. Instead of giving you Tests and Quizzes, I will take in consideration the work you do for this project, your interest, your dedication and care. You should delegate responsibilities carefully between group members and accept responsibility for your final product. Thanks for your understanding!

Mrs. Feld (February 4, 2009)

Monday, February 02, 2009

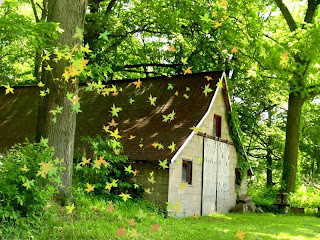
"Leaf Brush Exercise"

The "Leaf Brush Exercise" teaches you a few of the things you can do when using some of the special brushes and the Brushes Palette. The dynamic options in the Brushes Palette introduce variations of color, size, scattering, and other characteristics into the way a brush paints. When you choose Shape Dynamics, you can move the Size Jitter and Angle Jitter sliders to create brush marks of random sizes and angles. The Hue Jitter slider varies the color of the brush marks. You can use many different combinations. Follow the instructions carefully and GET CREATIVE!

In Photoshop we can use the Brushes in many ways. In this exercise you will learn a cool way of using the Leaf Brushes. You can even customize your own Brush – Leaf or Other Brush (by selecting a picture of your choice – e.g. a leaf or flower > selecting it with the magnetic lasso tool > creating a layer of your selection > moving it to a white background > then going to Edit – Define Brush and giving your new brush a name, then click OK).

You can use any of the Leaf Brushes already in your Photoshop Program.

1. Select a fall picture or other nature picture with trees (a nice landscape or scene with a big tree). Create a copy of the original and save it in your picture folder.

2. Select one of the Leaf Brushes on the toolbar. Select the Brush Tool > go to Brush on your toolbar.

3. Click the Brushes Tab next to the File Browser Tab in Adobe Photoshop 7 (or go to Window on your Menu Bar > select Brushes).

4. Making sure that your Brush Tool is selected - select the following in the "Brushes Palette": Shape Dynamics, Scattering and Color Dynamics (these should be checked – checks on the little squares). When you want to have more control of where to place your leaves, deselect “Scattering”.

5. Right-hand click on the Color Dynamics Option and change the percentages as follows:
Foreground/Background Jitter – 50%
Control – Off
Hue-Jitter – 50%
Saturation Jitter – 50%
Brightness Jitter – 0%
Purity – 0%
(With these changes you can spread leaves of different colors and different sizes all over the picture you selected – to create a colorful and artistic work of art). Practice with a few brush strokes, add more leaves or delete some (Edit> Undo or Step Backward).

6. Make sure to select the color you want to use by changing the Foreground Color (box in the Toolbox) to your liking. Use the brush on your pictures and see what happens. Practice selecting different colors and adding the leaves to your picture.You can create different effects by pressing the mouse more on certain areas. The more you press the mouse the more leaves you will see. Add a few here and more there. Change the brush size several times.

I need you to learn how to create your own brush. So please follow the instructions on the second paragraph. You can create a "Wrapping Paper" of "Wall Paper" creating a New Document with white background (800 x 800 pixels) and putting your brush all over the page (showing different colors). Get creative!

Sunday, February 01, 2009

Third Quarter

This Third Quarter we will be working on several Photoshop exercises and on creating the Alumnae Reunion Movie. You are presently working on the "Magazine Cover" assignment - please complete this exercise and make your cover look as professional as possible. Double-check the instructions to make sure you added everything you were supposed to add. If you need to improve it or add the UPC Code and Price, please do so. Ask other students for their opinions, it's good to hear constructive criticism. You can find this exercise in the Server, in the Photoshop Folder under 3rdQExercises.

After the "Magazine" assignment you will continue with "Like Magritte's" and with the "Leaf Brush" exercises. These exercises are also in the Server, in the Photoshop Folder under 3rdQExercises. Please read the instructions carefully and do your best! Above you can see an example created by Mrs. Feld called "Rose Beach." Get creative!