Feld's Digital Applications Classes

Tuesday, November 29, 2011

Digital Cameras

During this second quarter you will see a Digital Cameras Presentation and type notes for yourself. You will learn about digital cameras and how they work. Also, you need to learn the following vocabulary words for the test on December 7:

Digital Camera
Lens
Viewfinder
Body
CCD or Image Sensor
Steve Sasson
Pixels
Megapixels
Multimegapixels
Pixelated
Diodes
Film or Conventional Cameras
Resolution
Photorealistic
LCD Screen
DPI
PPI
Aperture
Shutter
Shutter Button
Shutter Speed
ISO
Noise
Compact Digital Camera
DSLR Camera

Movie Links: Movie 1, Movie 2, Movie 3, Movie 4 (please review these movies to find some of the vocabulary words and understand how digital cameras work).

Test: Wednesday, December 7, 2011.

Wednesday, November 16, 2011

Practicing Text in Photoshop

In order to remember how to use the Horizontal Type Tool in Photoshop, I want you to create a simple Poster using a picture of your choice (nature - beach or other) and enter one of your favorite quotes.

Use Blending Options on the text (Drop Shadow or other). Also, change the color of your image or add a filter to it (e.g. Dry Brush - which changes the image into a painting). Or try the Poster Edges filter.

Use font of your choice. Check the sample on top. Also practice adding a frame. Please read the previous entry as well.

Quiz: Tuesday, November 22, 2011 - Photoshop Commands.

Monday, November 07, 2011

Second Quarter - November through January

You have already learned many techniques in Photoshop. Next week you will have a Quiz on the commands we have learned in class - you have a handout mentioning these keyboard shortcuts and can add the few others learned in class and found in this blog (Quiz: Tuesday, November 22, 2011).

You learned how to create a New Document by going to File > New or simply pressing the Command and N keys on your keyboard. You also learned how to create a customized brush of your choice. As long as you have a layer of something on a transparent background, you can create a brush by going to Edit > Define Brush Preset.

You also learned how to select a Style from the "Styles Palette." First, making sure this panel is visible and then making sure your Background layer is not locked (double-clicking it to unlock) or simply duplicating this layer. Then selecting a Style of your choice. Remember that you can add more Styles by going to the tiny black triangle and selecting one or more of the options shown (then clicking Append).

You must also remember how to add "frames" using the Rectangular Marquee Tool. Once your frame is showing (once you make the selection on your image of where you want your frame) you go go Edit > Stroke. Change the color, enter the number of pixels and enter a few other options. Remember that it is a good idea to create your frame on a separate layer, so that you can add Blending Options to your frame. To add Blending Options simply double-click the right side of your layer. You can also do this with Text, once we learn how to add text in Photoshop (next week). Or you can do this with any layer created of an image (flower, animal, person, etc.) With Blending Options you can add shadows, inner or outer glows, bevel and emboss, etc. Remember to right-click the option too to change the sliders and find even more options.

I must be able to find the exercises we did in class in the Server, under your name in the Second Quarter Folder. You can practice the techniques learned some more. On November 8 we will work on the Nine of Me exercise. Please check the left-side of the Blackboard to make sure you have the exercises mentioned are already in the server for me to grade. Also, your Quiz exercise must be there.

If you want to work on other Photoshop Exercises, Connect to the Server, go to iLife06-1 > Photoshop > 2nd Quarter Exercises and work on Exercise No. 3 or 4.

Thursday, November 03, 2011

November 4, 2011

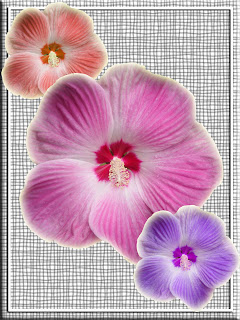
Mrs. Feld sample (not 7" x 6")

By now you have learned many Adobe Photoshop CS5 features. You learned how to import a picture, how to change colors, how to enlarge and shrink images, how to use the magnetic lasso tool, how to create and duplicate layers, how to create frames, how to add "blending options," how to add "filters," etc.

You must remember the keyboard-shortcuts mentioned in the previous entry, below (you also have a handout with them). Also remember the following:
  • Command-N (to create a new document in Photoshop)
  • Command-R (to view the ruler)
Quiz:
Today you will create an exercise similar to the one Mrs. Feld explained yesterday in class. The first thing you will do is Connect to the Server and find a picture of your choice with an image you can easily select with the magnetic lasso tool (it can be anything - flower, butterfly, fruit, bird). I suggest the "Amazing Flowers," "Dolphins," or "Fruits & Vegetables" Folders. Open the picture in Photoshop and select an image. Create a layer of the image in the picture (e.g. select the flower using the magnetic lasso tool). [YOU DON'T NECESSARILY HAVE TO CREATE A LAYER OF AN IMAGE TO MOVE IT TO ANOTHER LOCATION, BUT I WANT YOU TO PRACTICE DOING THIS - SO PLEASE CREATE A LAYER FIRST - USUALLY YOU CAN SIMPLY SELECT IT AND DRAG IT ELSEWHERE]. Then, create a New document (7 x 6 inches, RGB color, Resolution: 100) and download a Style of your choice - like we did in class. Then move the image selected into your new document with background. You must add blending options to your image. You will also duplicate the image and shrink it (so you have at least two images on your document). If you want you can duplicate the image more than once. Then, create a frame - like explained in class. Add Bevel/Emboss to you frame (blending options). Optional: you can change the color of your image or images (especially if it's a flower). When done, save it as a PSD document on your Second Quarter Folder on your Desktop and ALSO save it in the Server (as QUIZ) - I need to see the Photoshop Document (.psd) in the Server!

Today you will learn how to add text in a Photoshop Document. If we have time, I will also explain the Gradient Tool.