November 4, 2011

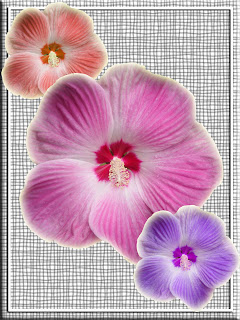
Mrs. Feld sample (not 7" x 6")
By now you have learned many Adobe Photoshop CS5 features. You learned how to import a picture, how to change colors, how to enlarge and shrink images, how to use the magnetic lasso tool, how to create and duplicate layers, how to create frames, how to add "blending options," how to add "filters," etc.
You must remember the keyboard-shortcuts mentioned in the previous entry, below (you also have a handout with them). Also remember the following:
Today you will learn how to add text in a Photoshop Document. If we have time, I will also explain the Gradient Tool.
You must remember the keyboard-shortcuts mentioned in the previous entry, below (you also have a handout with them). Also remember the following:
- Command-N (to create a new document in Photoshop)
- Command-R (to view the ruler)
Today you will create an exercise similar to the one Mrs. Feld explained yesterday in class. The first thing you will do is Connect to the Server and find a picture of your choice with an image you can easily select with the magnetic lasso tool (it can be anything - flower, butterfly, fruit, bird). I suggest the "Amazing Flowers," "Dolphins," or "Fruits & Vegetables" Folders. Open the picture in Photoshop and select an image. Create a layer of the image in the picture (e.g. select the flower using the magnetic lasso tool). [YOU DON'T NECESSARILY HAVE TO CREATE A LAYER OF AN IMAGE TO MOVE IT TO ANOTHER LOCATION, BUT I WANT YOU TO PRACTICE DOING THIS - SO PLEASE CREATE A LAYER FIRST - USUALLY YOU CAN SIMPLY SELECT IT AND DRAG IT ELSEWHERE]. Then, create a New document (7 x 6 inches, RGB color, Resolution: 100) and download a Style of your choice - like we did in class. Then move the image selected into your new document with background. You must add blending options to your image. You will also duplicate the image and shrink it (so you have at least two images on your document). If you want you can duplicate the image more than once. Then, create a frame - like explained in class. Add Bevel/Emboss to you frame (blending options). Optional: you can change the color of your image or images (especially if it's a flower). When done, save it as a PSD document on your Second Quarter Folder on your Desktop and ALSO save it in the Server (as QUIZ) - I need to see the Photoshop Document (.psd) in the Server!
Today you will learn how to add text in a Photoshop Document. If we have time, I will also explain the Gradient Tool.

0 Comments:
Post a Comment
<< Home